macOS下VMware合并vmdk
前言
业务需求,导致需要做vmdk镜像,故有这篇文章
正文
查找工具路径
合并vmdk需要用到vmware-vdiskmanager,在安装了DMG后,系统是无法直接识别到该命令的。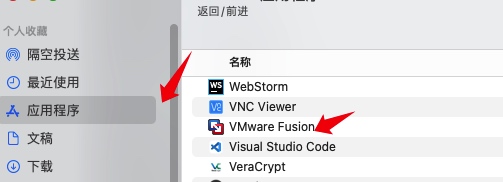
右键进入该应用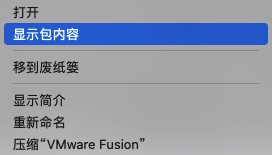
进入对应路径,找到该工具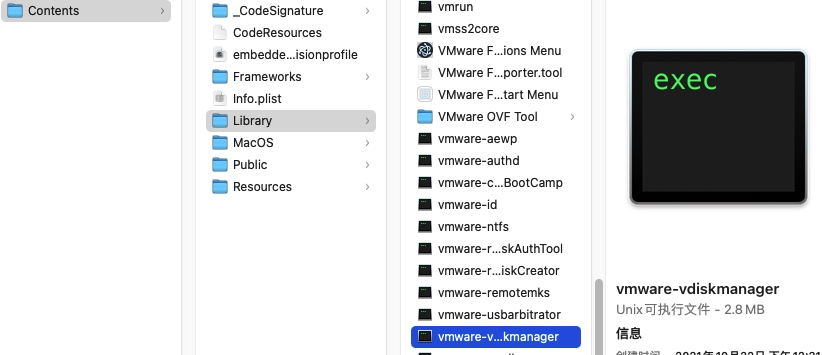
该工具的路径为/Applications/VMware Fusion.app/Contents/Library/vmware-vdiskmanager
正式使用
- 直接在终端中进入工具目录
cd /Applications/VMware\ Fusion.app/Contents/Library - 查看帮助文档
➜ Library ./vmware-vdiskmanager -h ./vmware-vdiskmanager: illegal option -- h VMware Virtual Disk Manager - build 18811640. Usage: vmware-vdiskmanager OPTIONS <disk-name> | <mount-point> Offline disk manipulation utility Operations, only one may be specified at a time: -c : create disk. Additional creation options must be specified. Only local virtual disks can be created. -d : defragment the specified virtual disk. Only local virtual disks may be defragmented. -k : shrink the specified virtual disk. Only local virtual disks may be shrunk. -n <source-disk> : rename the specified virtual disk; need to specify destination disk-name. Only local virtual disks may be renamed. -p : prepare the mounted virtual disk specified by the volume path for shrinking. -r <source-disk> : convert the specified disk; need to specify destination disk-type. For local destination disks the disk type must be specified. -x <new-capacity> : expand the disk to the specified capacity. Only local virtual disks may be expanded. -R : check a sparse virtual disk for consistency and attempt to repair any errors. -e : check for disk chain consistency. -D : make disk deletable. This should only be used on disks that have been copied from another product. -U : delete/unlink a single disk link. Other Options: -q : do not log messages Additional options for create and convert: -a <adapter> : (for use with -c only) adapter type (ide, buslogic, lsilogic). Pass lsilogic for other adapter types. -s <size> : capacity of the virtual disk -t <disk-type> : disk type id -z <level> : compression level for -t 5. Valid range: [0,9] Default: 1 Disk types: 0 : single growable virtual disk 1 : growable virtual disk split into multiple files 2 : preallocated virtual disk 3 : preallocated virtual disk split into multiple files 4 : preallocated ESX-type virtual disk 5 : compressed disk optimized for streaming 6 : thin provisioned virtual disk - ESX 3.x and above The capacity can be specified in sectors, KB, MB or GB. The acceptable ranges: ide/scsi adapter : [1MB, 8192.0GB] buslogic adapter : [1MB, 2040.0GB] ex 1: vmware-vdiskmanager -c -s 850MB -a ide -t 0 myIdeDisk.vmdk ex 2: vmware-vdiskmanager -d myDisk.vmdk ex 3: vmware-vdiskmanager -r sourceDisk.vmdk -t 0 destinationDisk.vmdk ex 4: vmware-vdiskmanager -x 36GB myDisk.vmdk ex 5: vmware-vdiskmanager -n sourceName.vmdk destinationName.vmdk ex 6: vmware-vdiskmanager -k myDisk.vmdk ex 7: vmware-vdiskmanager -p <mount-point> (A virtual disk first needs to be mounted at <mount-point>) - 参考最后的example3,更改对应的原vmdk,以及最终输出的vmdk路径。
./vmware-vdiskmanager -r sourceDisk.vmdk -t 0 destinationDisk.vmdk - 最终成果
➜  Library ./vmware-vdiskmanager -r /<Your_Source_Path>/win2k3.vmdk -t 0 /<Your_Dest_Path>/win2k3.vmdk

Creating disk '<Your_Dest_Path>/win2k3.vmdk'
  Convert: 100% done.
Virtual disk conversion successful.
➜  packet ll
total 37478144
-rw-------  1 yunoon  admin   4.0G  9  6 17:05 win2k3.vmdk
-rw-------@ 1 yunoon  admin    14G  9  6 11:14 win7.vmdk
➜  packet